By Amy Katz, Conservation Director
Recently, I went through the laborious process of building a custom hillshade for our full Heart of the Rockies geography. A hillshade is the foundational layer on a map that is textured to show elevation. As I started integrating this new basemap into our Keep It Connected project maps, I am fairly certain no one noticed the difference. In an attempt to draw attention to what I thought to be an appealing upgrade, which included a more refined colorful color palette and more subtle shading, I shared my new map with my colleagues – careful to point out the differences between the default ArcGIS basemap and the one I had just painstakingly created.
“See? This one is so much prettier!”

Left: The default map used in ArcGIS; right: my new map.
Responses varied from “very cool” to “super nerdy,” and the mixed feedback had me questioning the significance of my work as a cartographer and GIS practitioner. The response wasn’t out of the ordinary; typically my attempts to explain my job end somewhere around here:

However, my coworkers didn’t miss the plot entirely: everyone seemed to agree that the new map was aesthetically pleasing, and, at the end of the day, this made my cartographic heart happy. The thing is, although someone unfamiliar with cartography might not always be able to articulate significant differences between a quick map created within the defaults of a standard mapping software and a more refined cartographic product, most people still see and often even feel the difference. They notice when the colors fade from light olive to tan in the valleys and to white on the highest mountain peaks, or when the land ownership, rivers, and lakes stand out against subtle, watercolor-esque hues of blue and green.
Particularly for funders, who are often deciding whether to support a project partly based on the story our maps tell — and, in all likelihood, based on the way they feel when they look at them — an interesting, artistic, and unique map can make all the difference. This knowledge compelled me forward, and I started enthusiastically integrating my new hillshade into all of our Keep It Connected project maps.
For those who are interested in the mechanics of how I built my hillshade, keep reading for a short tutorial. For those who are not, may you now consider each map you see with a slightly different, more refined eye.
Building Your Own Hillshade
I hope this tutorial can accomplish two things: first, that it can provide our members who do use GIS and make maps something to consider and use in their own cartography; and, second, that it can demonstrate how much work goes into these projects behind the scenes and begins to train an untrained eye to recognize how subtle differences in the aesthetic qualities of this type of map can affect the way you think and feel about the represented place.
A hillshade, sometimes referred to as shaded relief, is a three-dimensional representation of terrain. Hillshading is the most popular technique for representing elevation, though topographic lines can also demonstrate elevation. We use digital elevation models (DEM) to create hillshades, which is a digital image layer that represents elevation through various pixel values from high to low.
Below, I briefly document the steps I took to create a Heart of the Rockies-wide hillshade, but please refer to this documentation for a more in-depth tutorial on how to use the numerous hillshade tools in ArcGIS Pro to create a more complex hillshade.
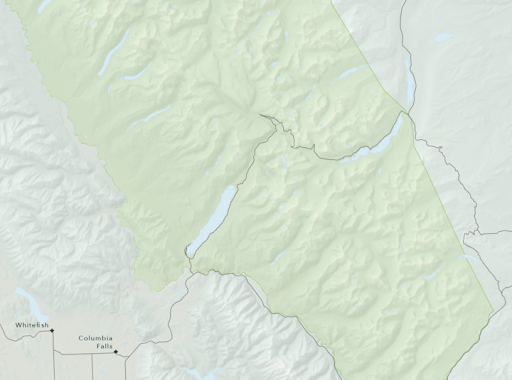
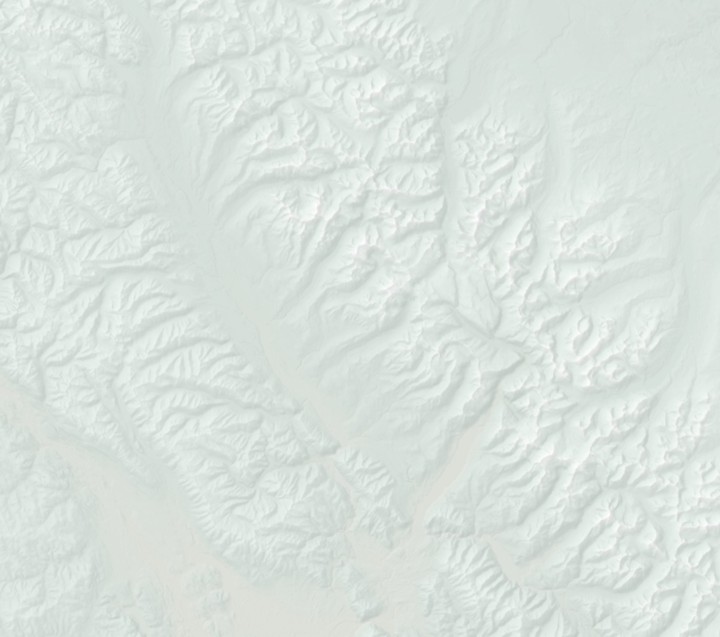
In my opinion, the most relevant advantage of building your own hillshade versus using a default one inside a mapping environment such as ArcGIS is that you can fully customize color schemes, textures, and other geographical features. Additionally, you can control the illumination and shadows to achieve a more refined and realistic perspective. These adjustments are essential when you are creating maps that must communicate specific information besides the topography, which can often be distracting in the background. For example, here is the default basemap on ArcGIS Pro for the Glacier National Park area:
You can see the peaks and valleys are represented in very dark shadows, and that it is very dark below the other layers. My goal was to create something different that I could control and adjust as I built up my other map layers.
Assembling the data
To create one from scratch, I first had to download all of the DEM tiles that made up my area of interest. For our large service area, this was a whopping 196 tiles. The easiest way to download DEMs is through this convenient interface. (Note that you will have to make a free account with EarthData before you can download tiles.) If you’re working in an area that is larger than a single tile, you will need to pull all relevant tiles into ArcGIS and then stitch them together using the Mosaic tool. Esri has a great tutorial on this here.
Building the hillshade
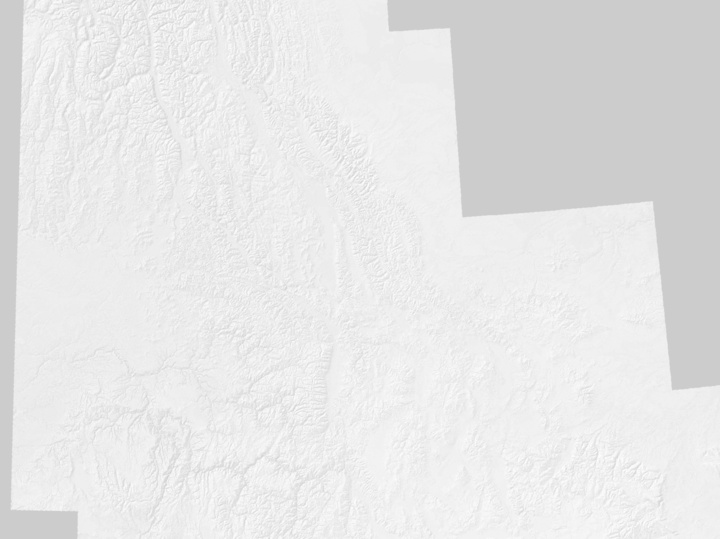
To create a new hillshade from a DEM, you can use the Hillshade tool in ArcGIS Pro. Other comparable mapping softwares have some version of this tool, which utilizes the elevation values in the DEM to illuminate the surface. Here is a more in-depth explanation of how hillshading works. Once I ran the tool on my raster layer and then adjusted the color gradient to go from light grey to white, I ended up with something that looked like this:
Symbolizing the Digital Elevation Model
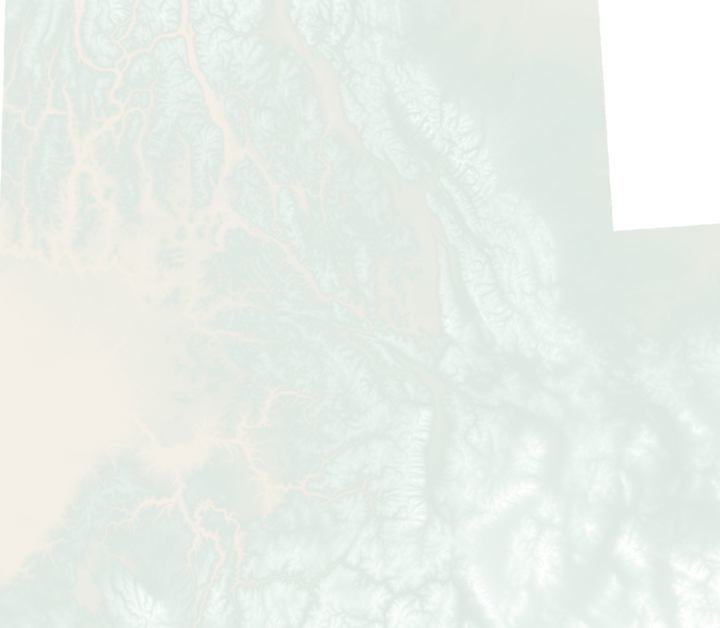
Next, I took the original DEM layer and resymbolized it as well, using this color palette I pulled from another hillshade I liked the look of:

I ended up with this:
From here, simply drag the DEM on top of your hillshade and bump down the opacity to 50% or so to start:
Finishing Touches
Now you have a nice background layer to start with. I added the National Park polygon, as well as roads, cities, and water features that I pulled from the National Land Cover Database:

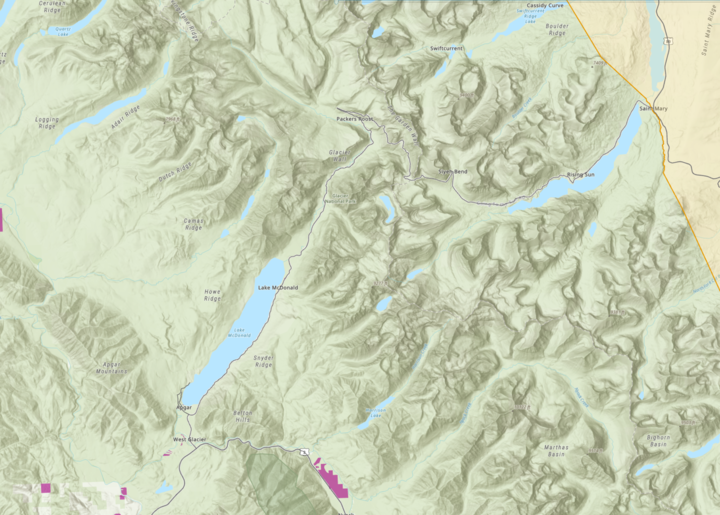
To compare this back to the default map inside of ArcGIS Pro, you can see the new version is much more subtle, and less distracting, but is still able to convey the topographic features of Glacier National Park:

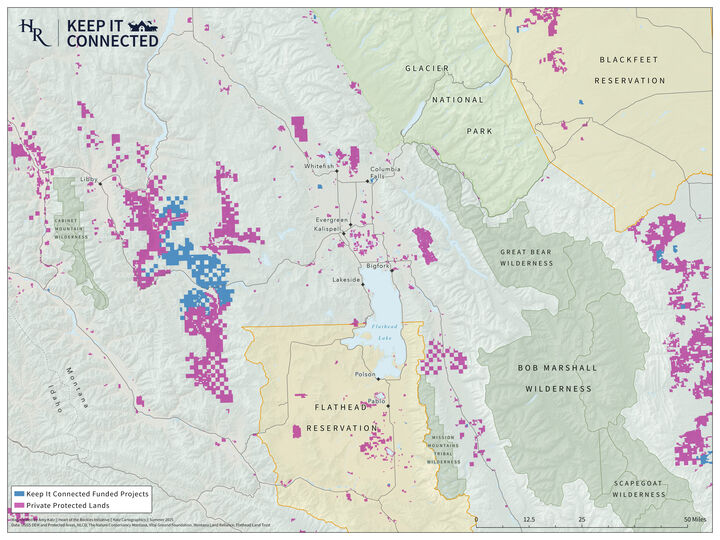
Here is the hillshade in action!